After a long time of working with VMs on windows for linux environment, about three months ago I decided to switch to the Windows subsystem for Linux after going through a lot of stuff online to decide whether it is worth doing it or not ?
My opinion now….. Absolutely worth it !!!
It is not perfect as of now and still growing with features but it is the closest you can have a linux environment without dual-booting or using VM. This saves a lot of pain of using VM and dual booting your laptop or PC. One can do scripting, automate stuff and streamline workflow…. the list goes on. But the default colors are quite unreadable and thus one has to customize this stuff. Unlike ubuntu, kali or any linux flavor, customizing bash on windows is a long process and while I was doing this I couldn’t find a thing which listed all the steps that worked. Some did and some didn’t. So it was all try and experiment. And hence this post for customizing bash…
We’ll start from setting up bash to entire customization.
👉 Prerequisites
To get started, make sure you have the 64-bit version of Windows 10 with anniversary update installed.
🌋 Installation of Bash
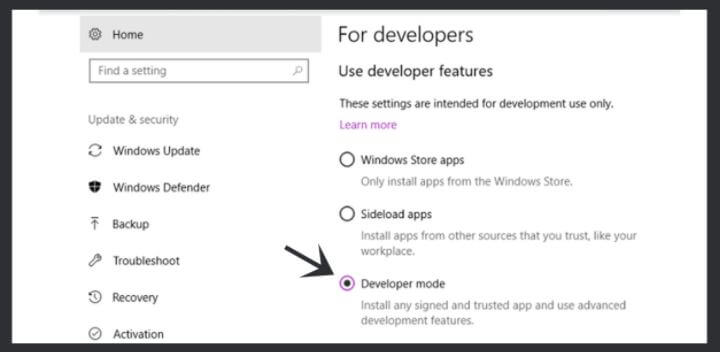
Step 1 ▶️ Enable the Developer Mode
Go to Start > Settings. From here, navigate to Update & Security options. Select For developers option from the left sidebar, and choose the Developer mode. It will prompt a confirmation message. Confirm it, and the developer’s mode will be enabled.
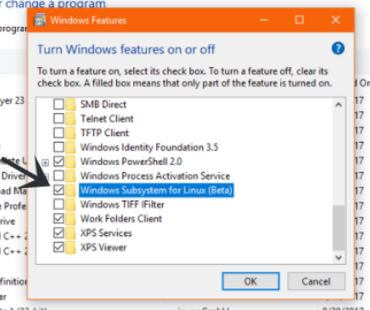
Step 2 ▶️ Install Windows Subsystem for Linux
Go to Control Panel > Programs > Programs and Features. Click on Turn feature on or off. A dialog box will pop up. Scroll down, and check Windows Subsystem for Linux (Beta), and click OK. It will install the required files. Once you are done, restart the computer.
Step 3 ▶️ Install Ubuntu System Files
After the computer restart, go to the Start menu, and search for bash.
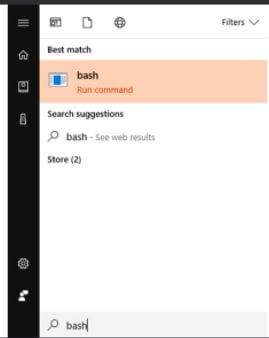
Here, it asks for your permission to install the Ubuntu system files. Type ‘y,’ and hit Enter. It will download and install files from Microsoft Windows Store. After installation, it asks for the username and password.
Enter the credentials, and bash is ready to use. Next time you need to run bash, go to start menu, type bash, and select ‘Bash on Ubuntu on Windows,’ to start.
🔥 Customization of Bash
Now we’ll customize bash to make it colorful and awesome. For this I am going with Z Shell ( zsh ) and oh-my-zsh with color scheme being solarized dark. Now, Bash Shell is the default shell for WSL( Windows Subsystem for Linux ). But you might want to change to zsh for the better features it provides over bash. A few of them are auto-correct, auto-complete, and on the top oh-my-zsh. You can also check this link and you will know why almost everyone is in love with zsh.
Step 1 ▶️ Install Z Shell
To install Z Shell, open bash, and type the following command:
$ sudo apt-get install zsh
Just type zsh in the bash to start using it.
Step 2 ▶️ Set Z Shell as Default Shell
Type nano .bashrc to open the configuration file and the following lines to it. So, every time you launch bash, it launches zsh only.
 # Launch zsh.
 if [ -t 1 ]; then # Bash' output is terminal.
 exec zsh # Run zsh.
 fi
Press Ctrl+O, and then hit Enter to write the changes. Press Ctrl+X to go back. Now, every time you open bash, it will open zsh, instead of default the bash.
Step 3 ▶️ Install oh-my-zsh
It’s a community-driven framework for managing the configuration of zsh and comes with a great bunch of plugins, and themes. To install oh-my-zsh, open up zsh, and type the following command:
curl -L https://raw.github.com/robbyrussell/oh-my-zsh/master/tools/install.sh | sh
This will install oh-my-zsh for zsh.
Step 4 ▶️ Change the Theme
Oh-my-zsh comes with a plenty of themes. You can see the list here. I’ll be using “Agnoster” with the solarized dark color scheme, and DejaVuSansMono font. To change the theme, type following command:
nano .zshrc
Find the following line -
ZSH_THEME="robbyrussell"
Change ‘robbyrussell’ to ‘agnoster’ and press Ctrl+O to write, and Ctrl+X to return. Your theme will be changed. You can choose any theme whichever you like.
Step 5 ▶️ Install Fonts
After getting the theme, you may see few symbols missing as you don’t have powerline fonts installed on your windows. Download and install fonts from here. Do these steps to install fonts Control Panel > Search for Fonts in search box > select option View Installed Fonts > Drag and drop your desired font from cloned repository. Your fonts will be installed. After installation, go to the properties of the bash and select the font which you like. I am using DejaVuSansMono font that you can get here.
Step 6 ▶️ Change Color Scheme
Go to the Properties of bash, and change the colors according to the following table. The RGB values can be found here.
| Color # | Solarized colors |
|---|---|
| 0 | base02 |
| 1 | blue |
| 2 | green |
| 3 | cyan |
| 4 | red |
| 5 | magenta |
| 6 | yellow |
| 7 | base2 |
| 8 | base03 |
| 9 | base0 |
| 10 | base01 |
| 11 | base1 |
| 12 | orange |
| 13 | violet |
| 14 | base00 |
| 15 | base3 |
Finally color tab would look like this:

And the bash should look like this:
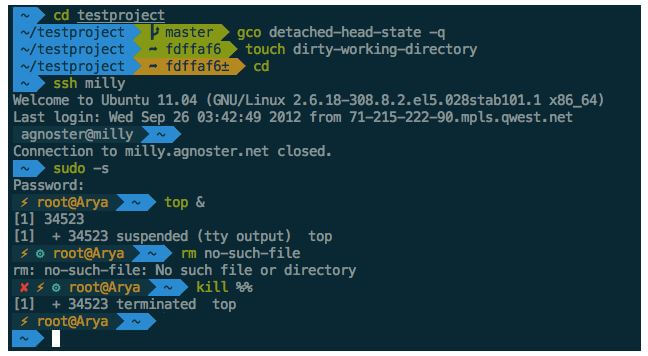
Looking fab, right?
If you have any questions, tips, feel free to comment below.